Using your own Dropbox App is optional. For an easy setup you can just use the default App of the plugin itself. The advantage of using your own app is limited, but you can for example see your own API usage statistics in the Dropbox App Console.
Step 1: Access the Dropbox App Console
- Go to the Dropbox App Console.
- Sign in with your Dropbox account.
Step 2: Create a New App
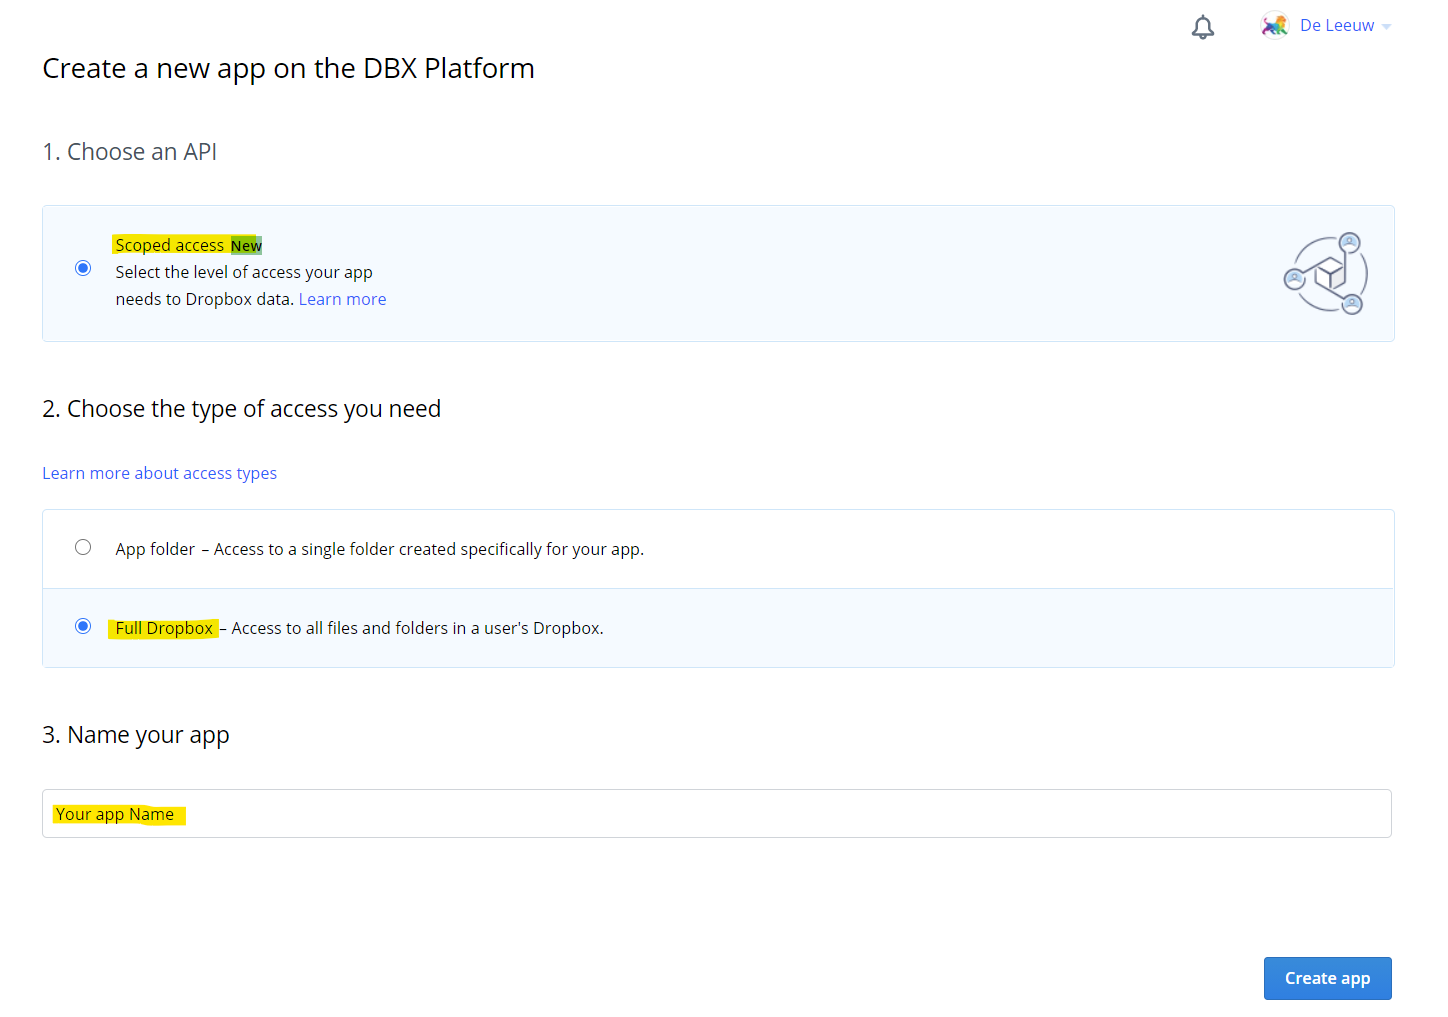
- Click Create app.
- Under Choose an API, select Scoped Access.
- Under Choose the type of access you need:
- Select Full Dropbox if the plugin should be able to access your complete Dropbox.
- Or select App folder if the plugin should only have access to the folder
/Apps/YourAppName. Note that folders inside the App folder cannot be shared.
- Enter a name for your app.
- Click Create app.
Step 3: Configure the App and Get Credentials
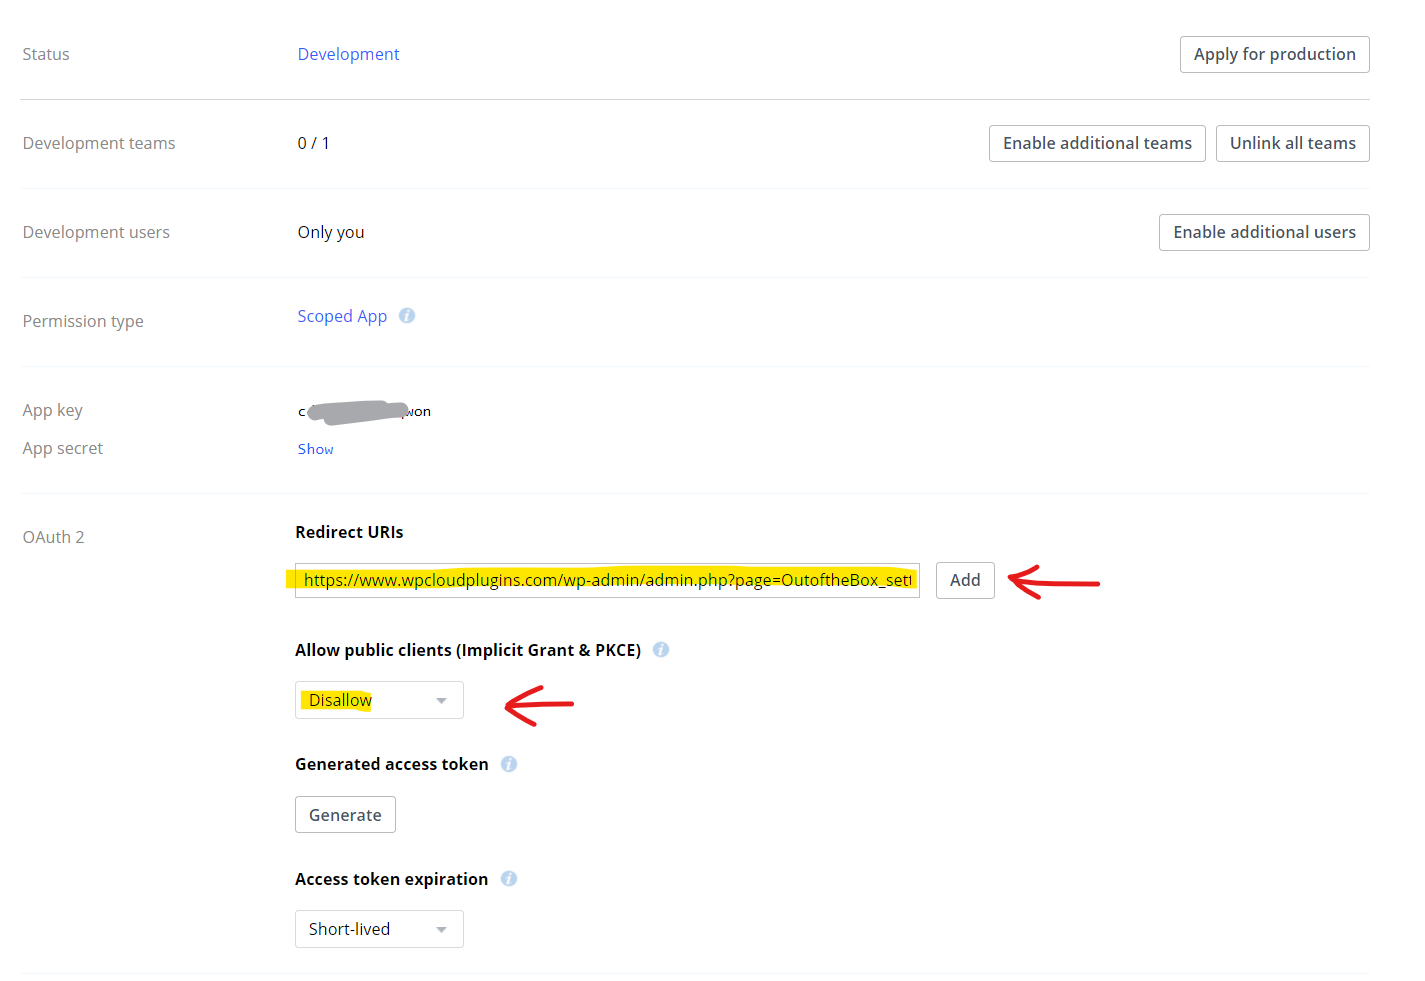
- On the Settings tab, find the App key and App secret.
- Enter these values on the Advanced tab of the main plugin settings page.
- Save the plugin settings page.
Step 4: Set the Redirect URI
- Copy the OAuth 2.0 Redirect URI shown on the plugin's main settings page.
- Back in the Dropbox App Console, paste this URL in the Redirect URIs field on the Settings tab and press Add.
- Disable Allow public clients (Implicit Grant) if this option is shown.
- Submit the changes.
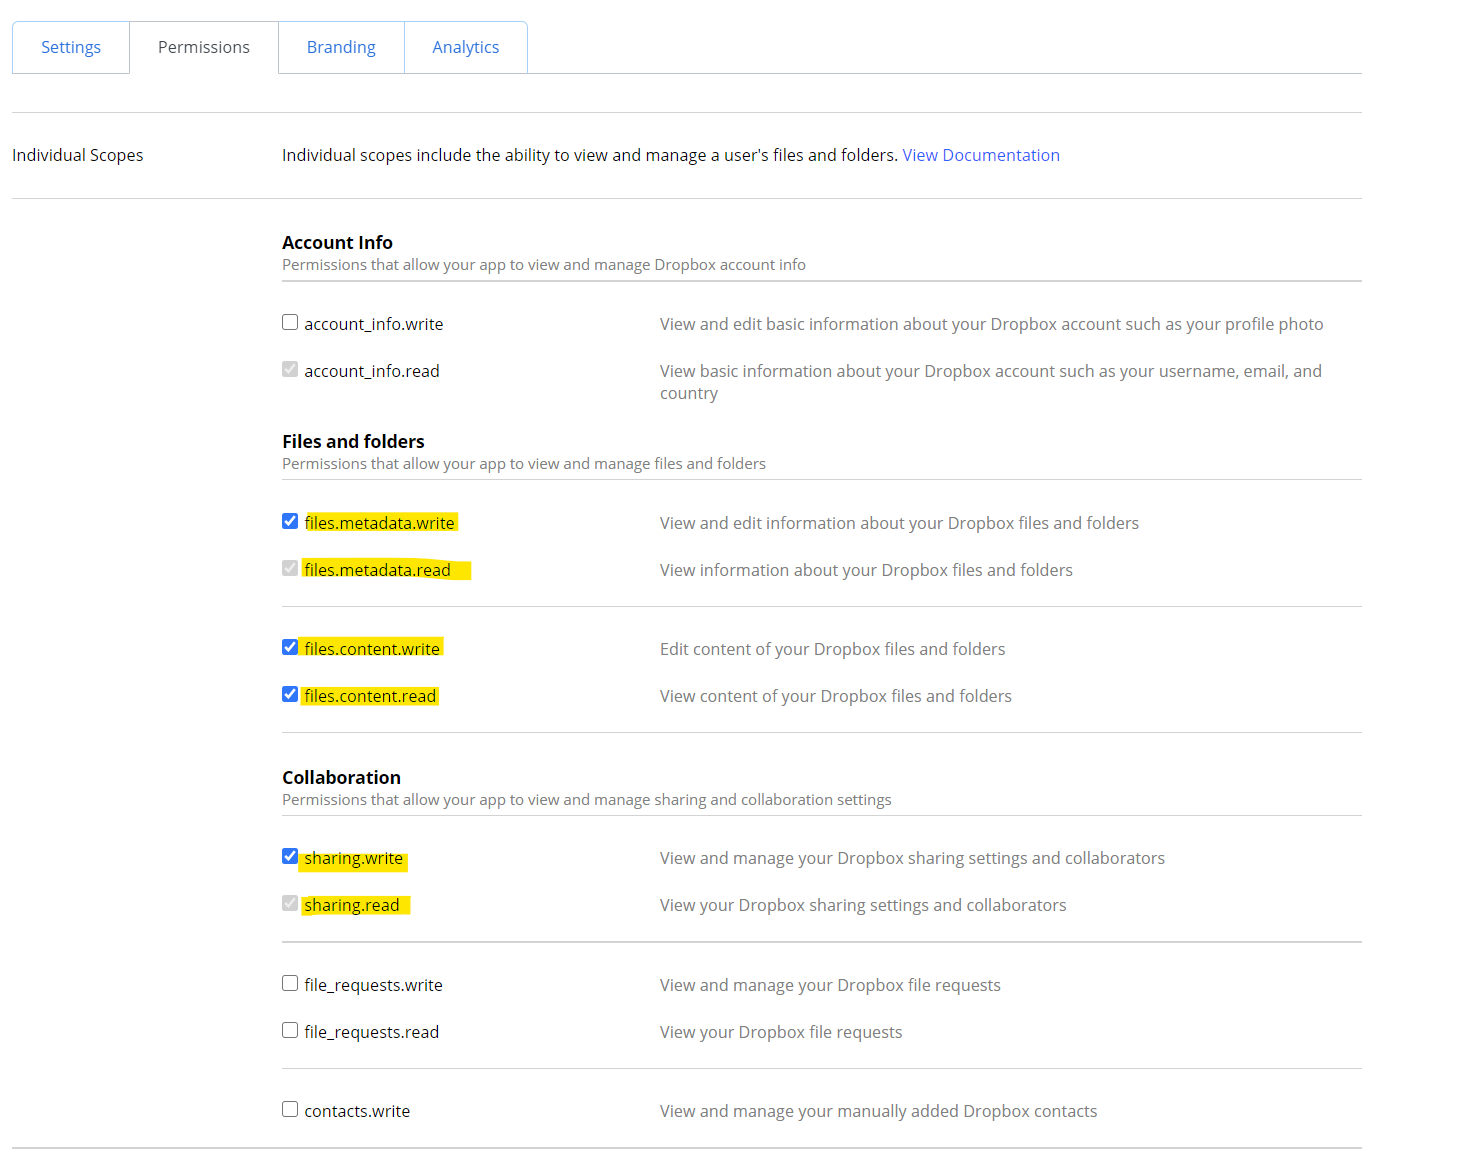
Step 5: Configure Permissions
Open the Permissions tab and enable the following scopes:
account_info.readfiles.metadata.writefiles.metadata.readfiles.content.read-
files.content.write(only if the plugin needs upload or write functionality) -
sharing.readandsharing.write(for shared link functionality)
Click Submit to save the permissions.
Step 6: Authorize the Plugin
On the plugin's settings page in WordPress, click Add Account on the Dashboard tab to complete the OAuth flow.
Notice: If you run into issues using your own App, fall back to the default App by clearing the App key and App secret on the plugin's settings page.